# View Module in Smile
# Objective
We will build a Library application. The Library application has the following requirements:
A user can add a book and should be able to add a category to it
A user can search for a book and should be able to see details page of a particular book.
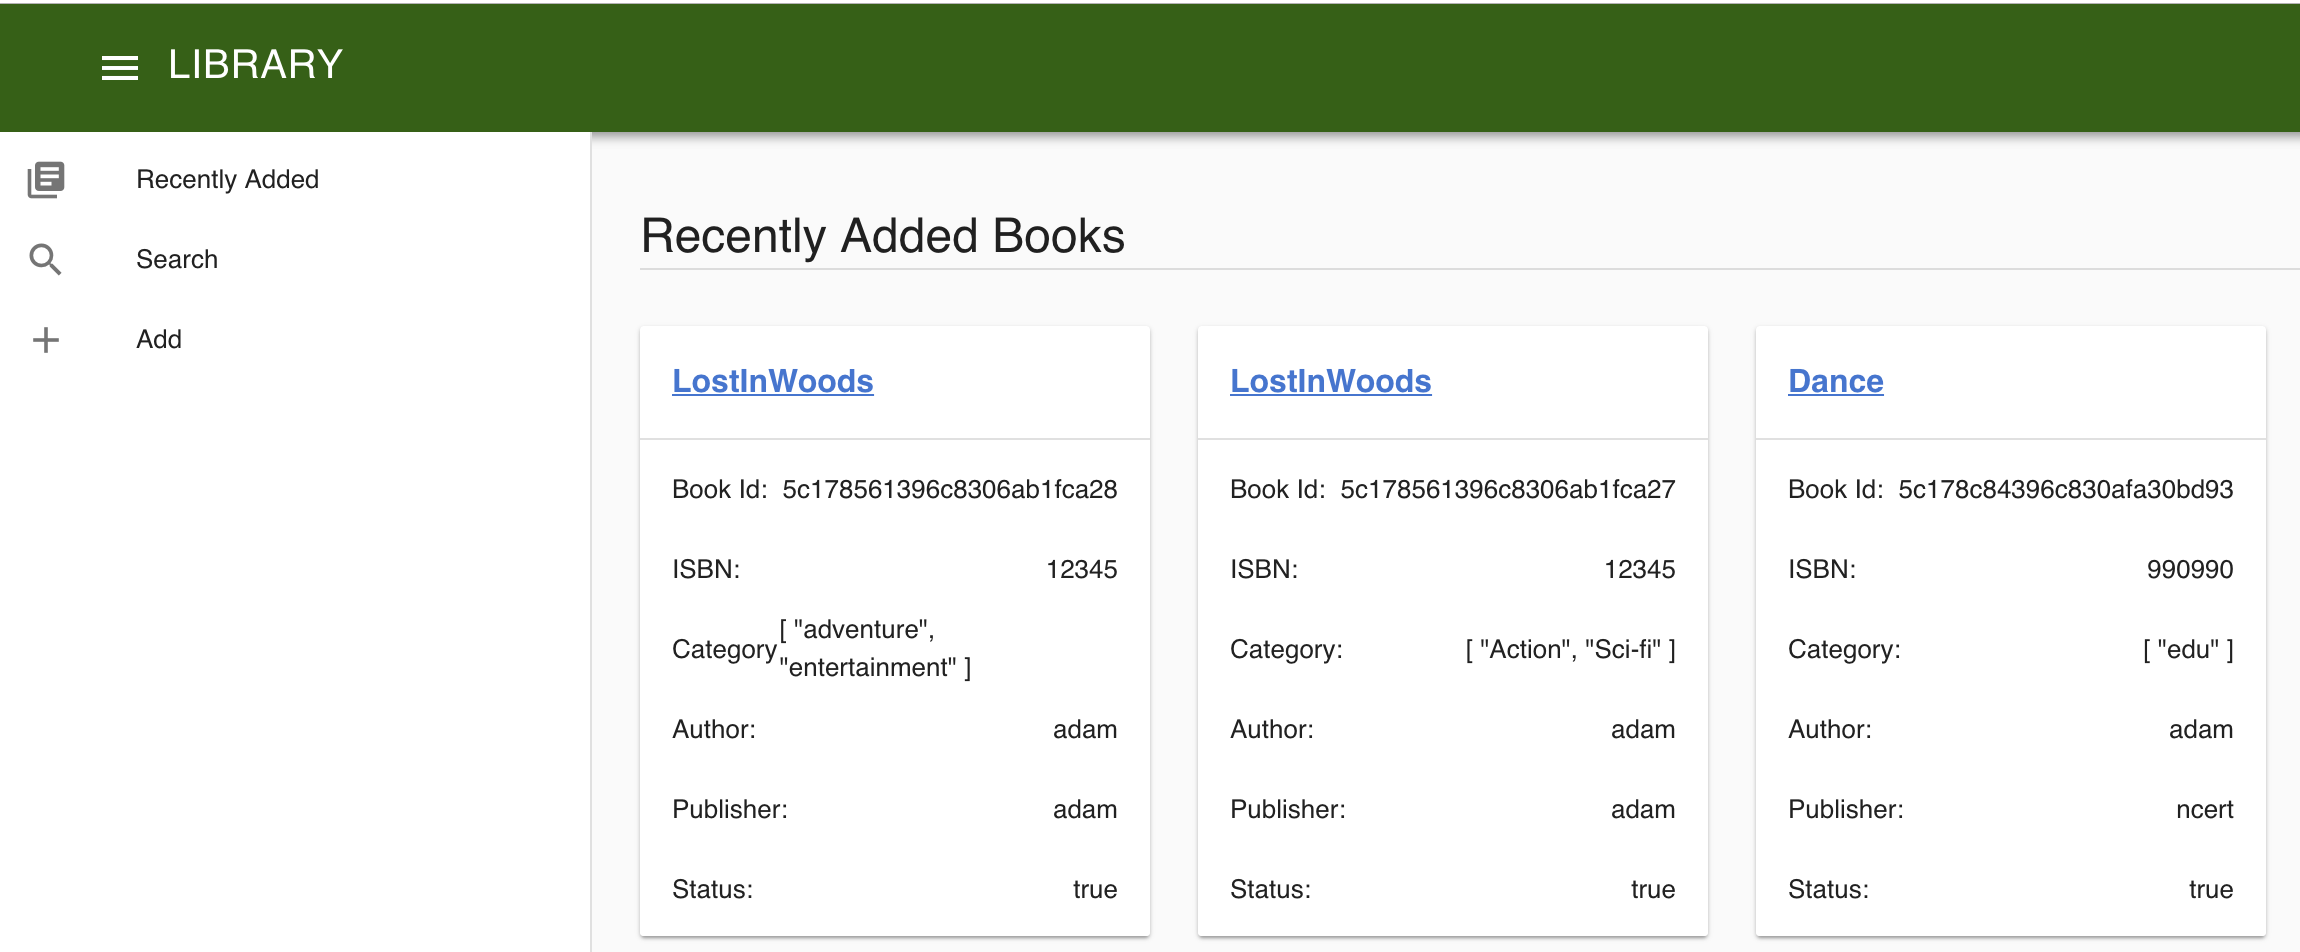
A user can view recently added books
So, we need five pages - to add a book, add category to a book, search a book, details of book and view recent books which we will design as shown:
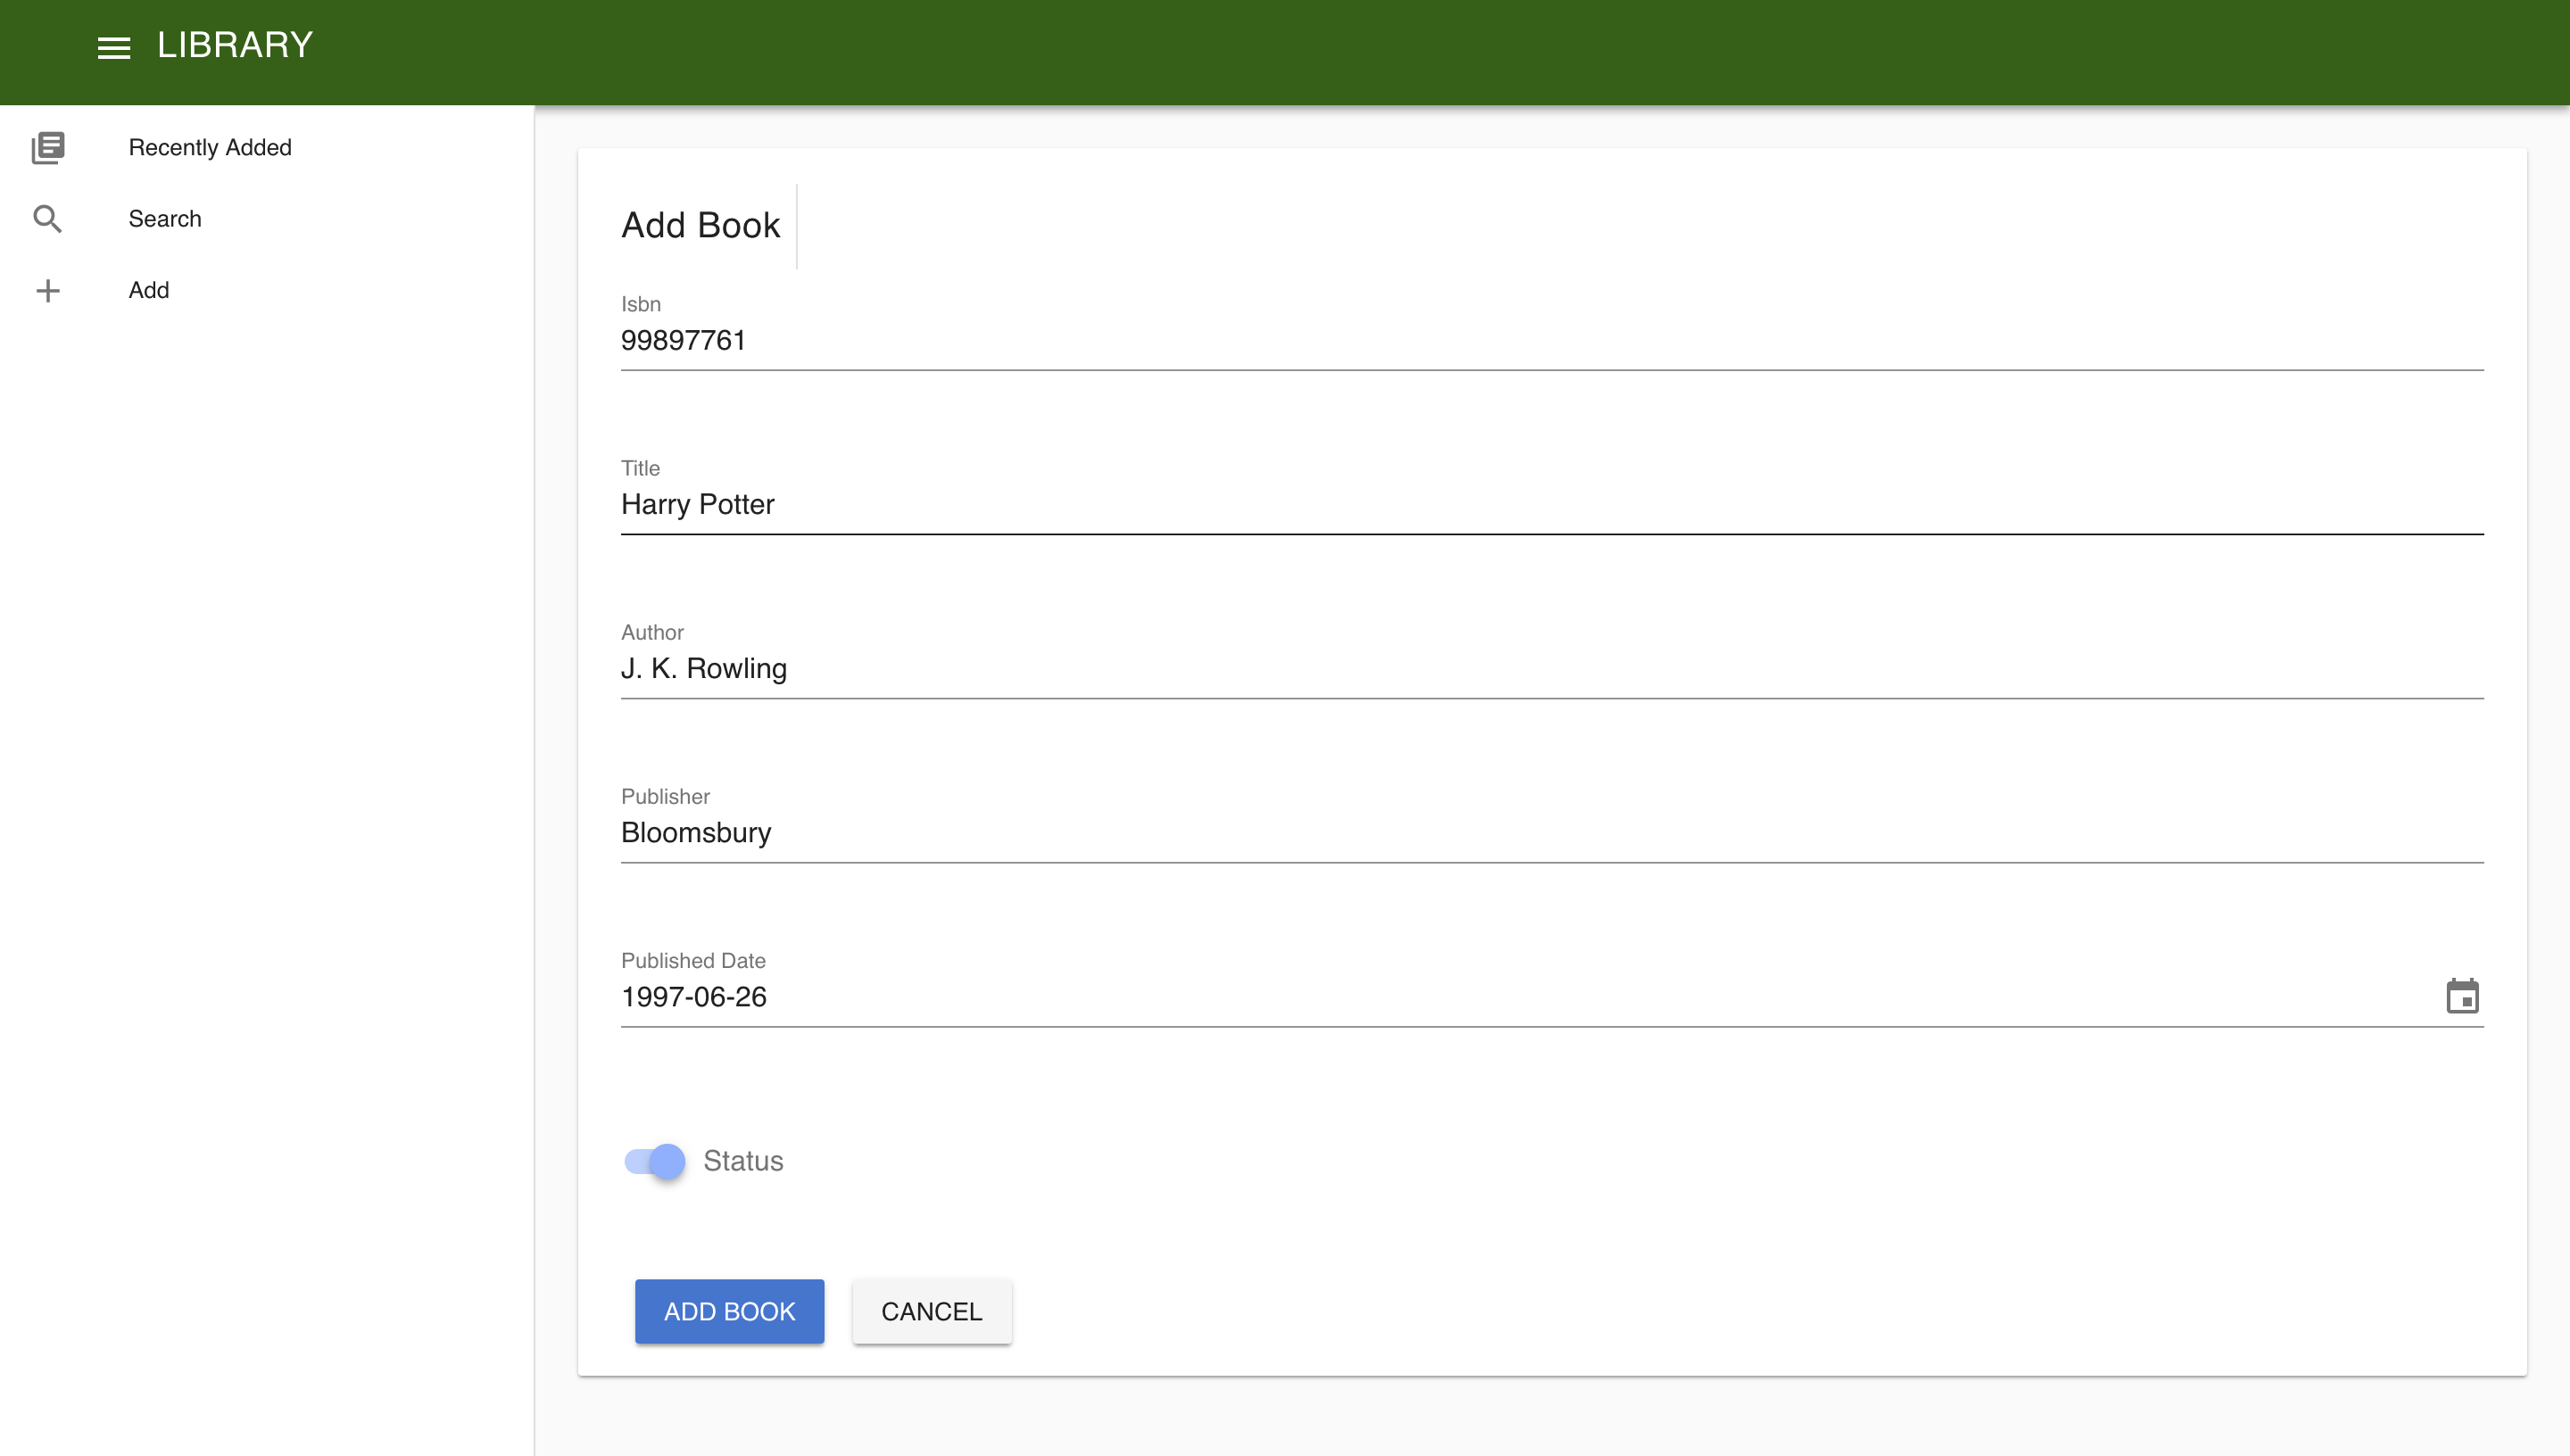
The add page
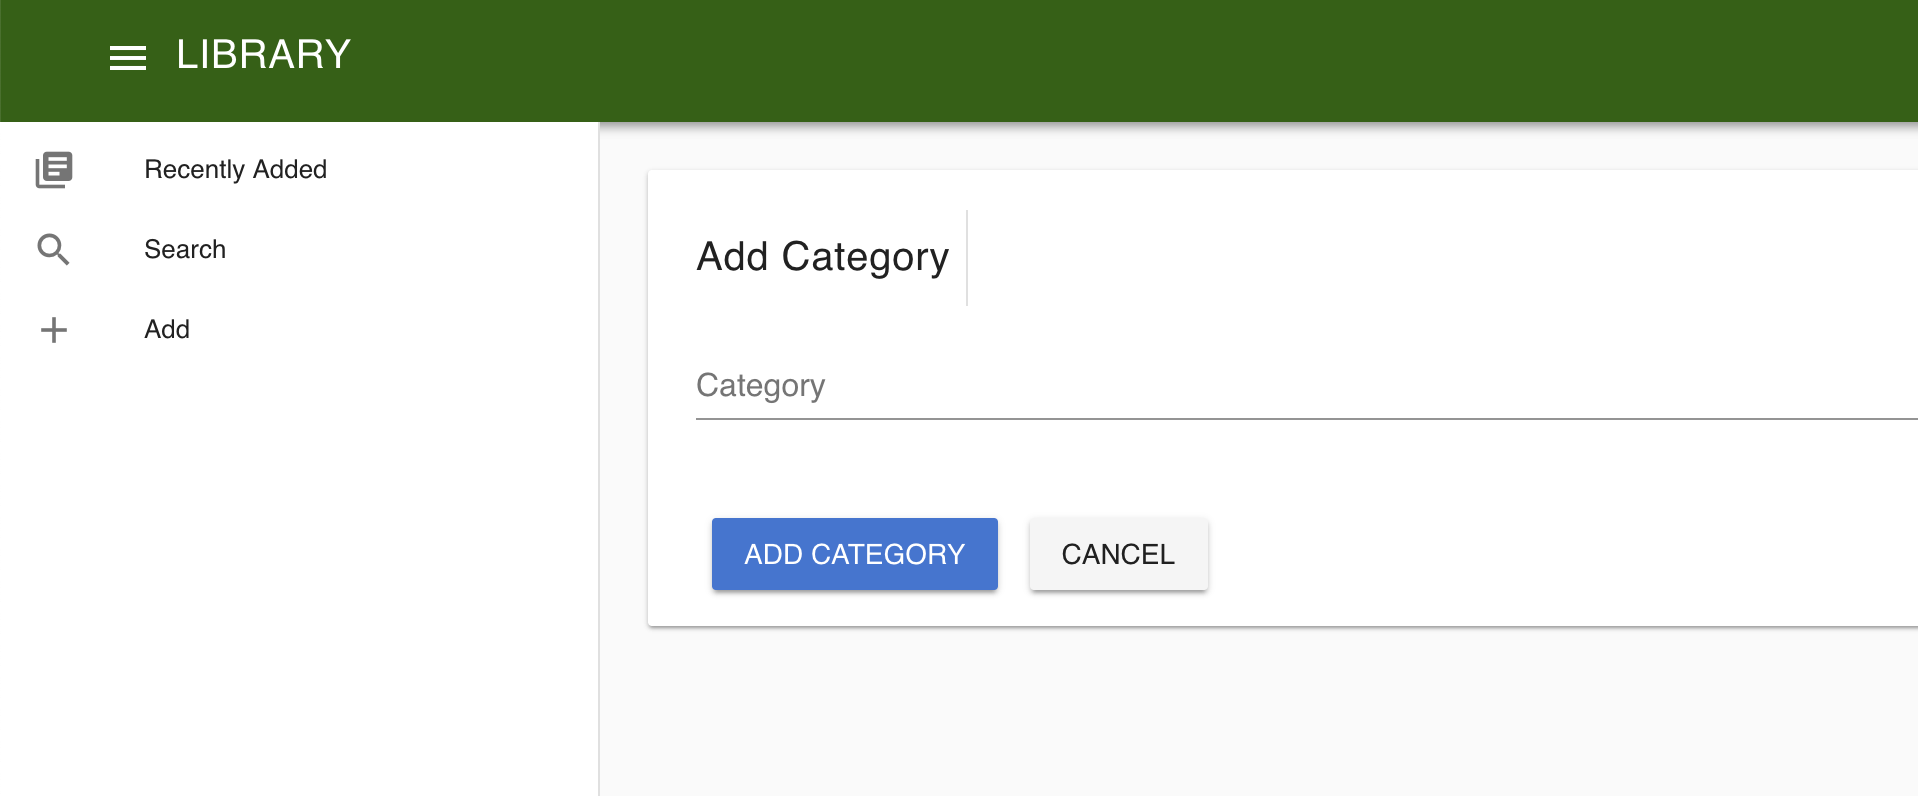
Add category page
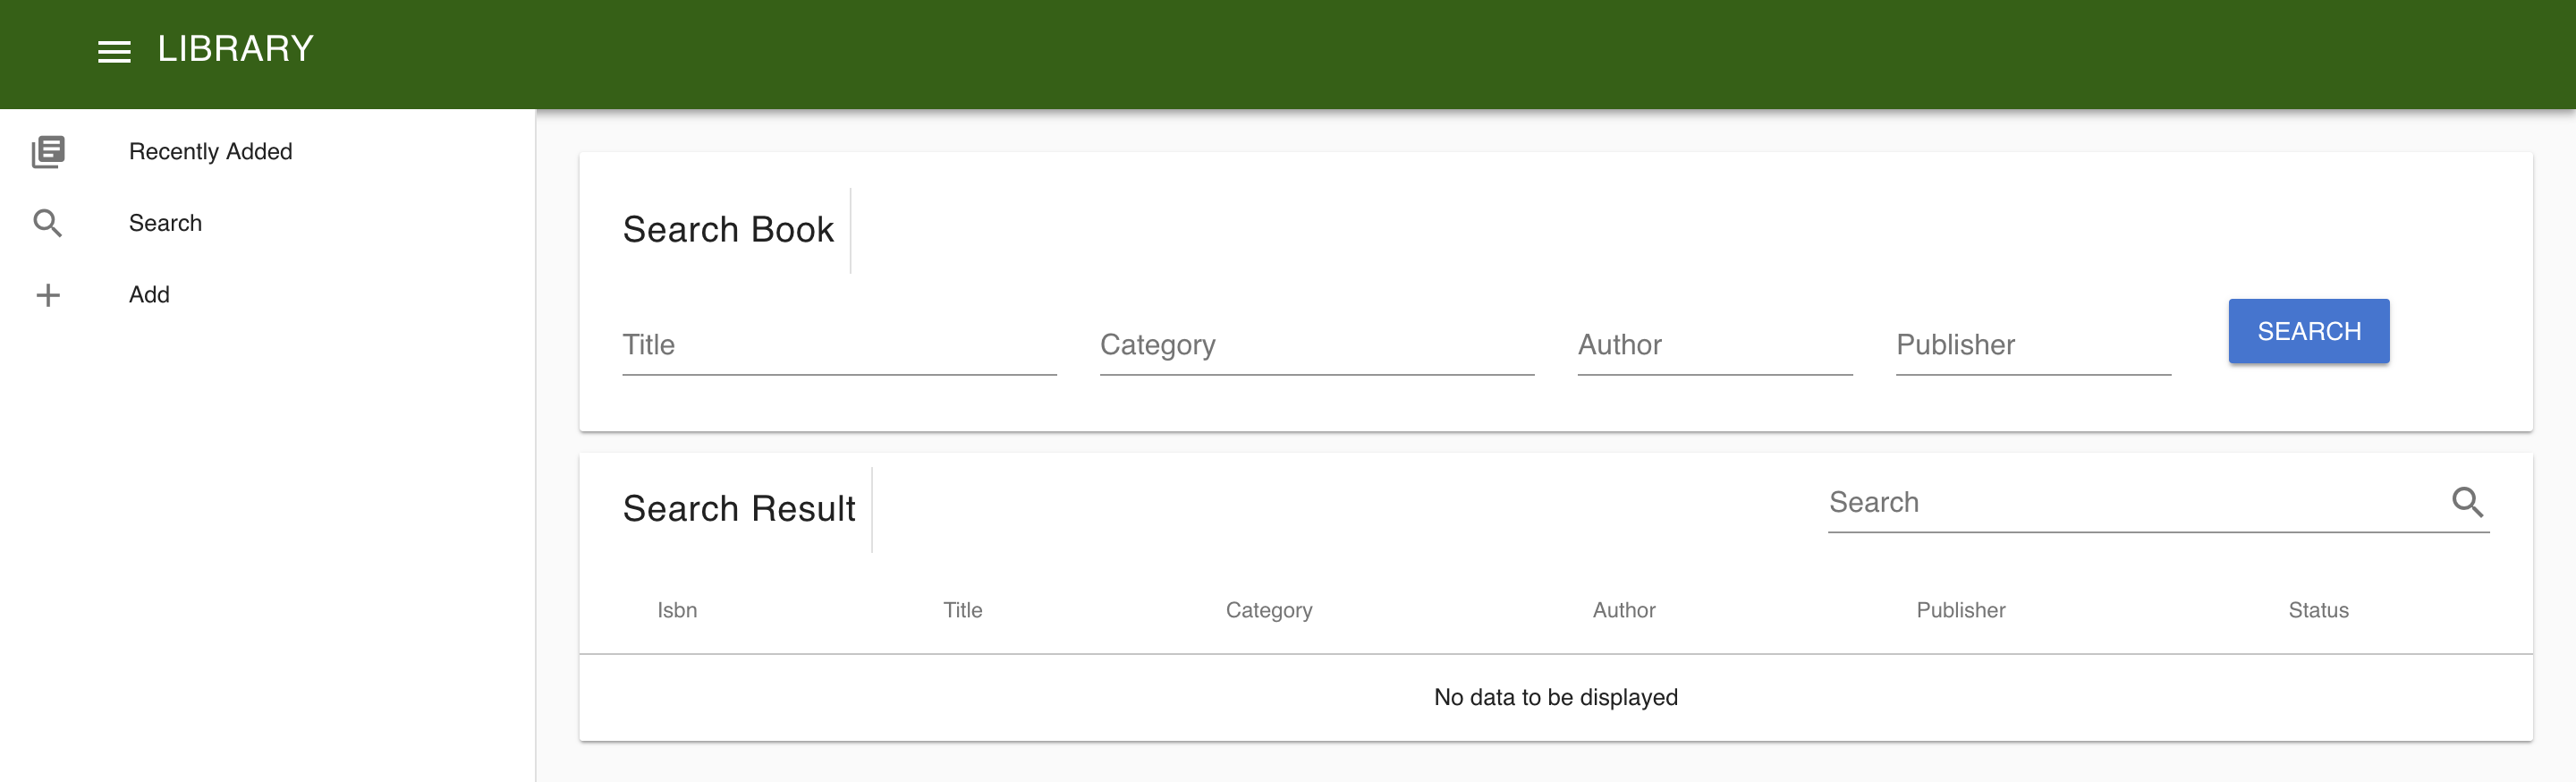
The search page
The details page

The recentBooks page
# Setup
We need to setup our VScode by installing few plugins.
- Tslint Vue
- Vetur
- http://csetutorials.com/format-vue-files-visual-studio-code.html
# Create a new project
Create a Library Project and add component which already has api to integrate with Vuejs
- Create a Library project
$ smile new Library
$ cd library
/library $ sbt
[Library] $ smile
- Add component
[Library] $ add-component libra-api_release-0.1
[info] downloading libra-api_release-0.1-smile-3.4.0.zip from https://bitbucket.org/sanjibkg/smile-repo/downloads ...
######################################################################## 100.0%
[info] libra-api_release-0.1 is installed in local repository
[info] libra-api_release-0.1 is added to the project
[info] refresh eclipse project
[info] add the import  'import-component libra-api_release-0.1(LibraApi,LibraData,LibraDomain,LibraMongo)' to /Users/sagarmahapatra/i3/library/k/Library.ksmile and smile.
- Import the project and also the component to Eclipse and add the import-component to
library.ksmile
import-component libra-api_release-0.1(LibraApi)
- smile
$ smile
- Import the downloaded Libra component to eclipse.
Video reference:
# Add a view module
- Add the following to
.ksmilefile
section library {
    view-module libraryview at libraryview
}
- Run the command smile and refresh Eclipse to see
libraryview.kview
$ smile
you will get the below warning
$ Do the following two steps to set up the module
[warn]  1. go the module in sbt and run generate
[warn]  2. from the command prompt, cd to modules/library/libraryview and 'npm install'
- Open a new terminal and go to the libraryview directory i.e cd to modules/library/libraryview, and run the npm install command.
$ cd library/modules/library/libraryview/
$ npm install
- Open
libraryview.kview, update the route
route "library"
- In sbt execute the compile, run command.
$ compile
$ run
- Open libraryview terminal and run npm
$ ~/library/modules/library/libraryview $ npm run serve
Open browser http://localhost:8080/library

Video reference:
# Add Remote Api Point
- open
libraryview.kviewin eclipse and add the remote api point.
remote-api-point LibraApi => "LibraApi"
NOTE
It has to be placed before route and after module.
- Open
remote-api-point.tsin VScode and add the line "export const LibraApi = axios;"
import axios from 'axios';

export default class RemoteApiPoint {

   public static setup() {
     axios.defaults.headers.common['X-Requested-With'] = 'XMLHttpRequest';
   }

}
export const LibraApi = axios;
# Create Layout
Open
libraryview.kviewin Eclipse and add layout,slot.Add a section and name it library, inside which we design the layout.
section library {

	layout Root ('/')  as "" slot(default, toolbar = Toolbar, navbar = Navbar)

}
NOTE
In this project there are 3 slots - toolbar, navbar, default (where the content is displayed).
NOTE
Section are created to make the code more readable and organised.
- Add view for toolbar and navbar inside library section.
view Toolbar,Navbar under "bar"
NOTE
under "bar" - puts the Toolbar & Navbar file inside a folder called "bar".
- Create the required pages i.e RecentBooks, Search, Add.
layout Root ('/')  as "" slot(default, toolbar = Toolbar, navbar = Navbar)  {
		page RecentBooks('recent-books') view(^default=Recent)
		page Search('search') view(^default=Search)
		page Add('add') view(^default=Add)
		redirect ("") to RecentBooks
	}
- Add another layout for details page which will display book details, under which create two pages i.e Summary, AddCategory.
layout Root ('/')  as "" slot(default, toolbar = Toolbar, navbar = Navbar)  {
		page RecentBooks('recent-books') view(^default=Recent)
		page Search('search') view(^default=Search)
		page Add('add') view(^default=Add)
		layout Details (":bookId") slot(holder) {
			page Summary("details") view(holder = Details)
			page AddCategory("add-category") view (holder = AddCategory)
		}
		redirect ("") to RecentBooks
	}
NOTE
":bookId" tells that there should be a parameter bookId which should be passed to the URL to redirected to the pages under that layout. As every detail, add category page should be specific to a bookId.
NOTE
When there are no more layouts to be created give the slot name as "holder" (can be anything except default).
- Add view for all the pages
view Recent,Search,Add under "book"
view Details,AddCategory under "book"/"details"
- Open
RootLayout.Vuefile in VScode and add Layout code inside template.
  <v-app id="theVapp">
      <router-view name="toolbar"/>
      <router-view name="navbar" :key="$route.fullPath"/>
      <v-content class="fill-height" >
       <v-container  fill-height grid-list-xl>
        <v-layout justify-center id="root-layout-default">
          <v-flex fill-height><router-view/></v-flex>
        </v-layout>
      </v-container>
    </v-content>
  </v-app>
- Add Layout code in
DetailsLayout.Vue
  <v-container pa-0>
    <router-view name="holder"/>
  </v-container>
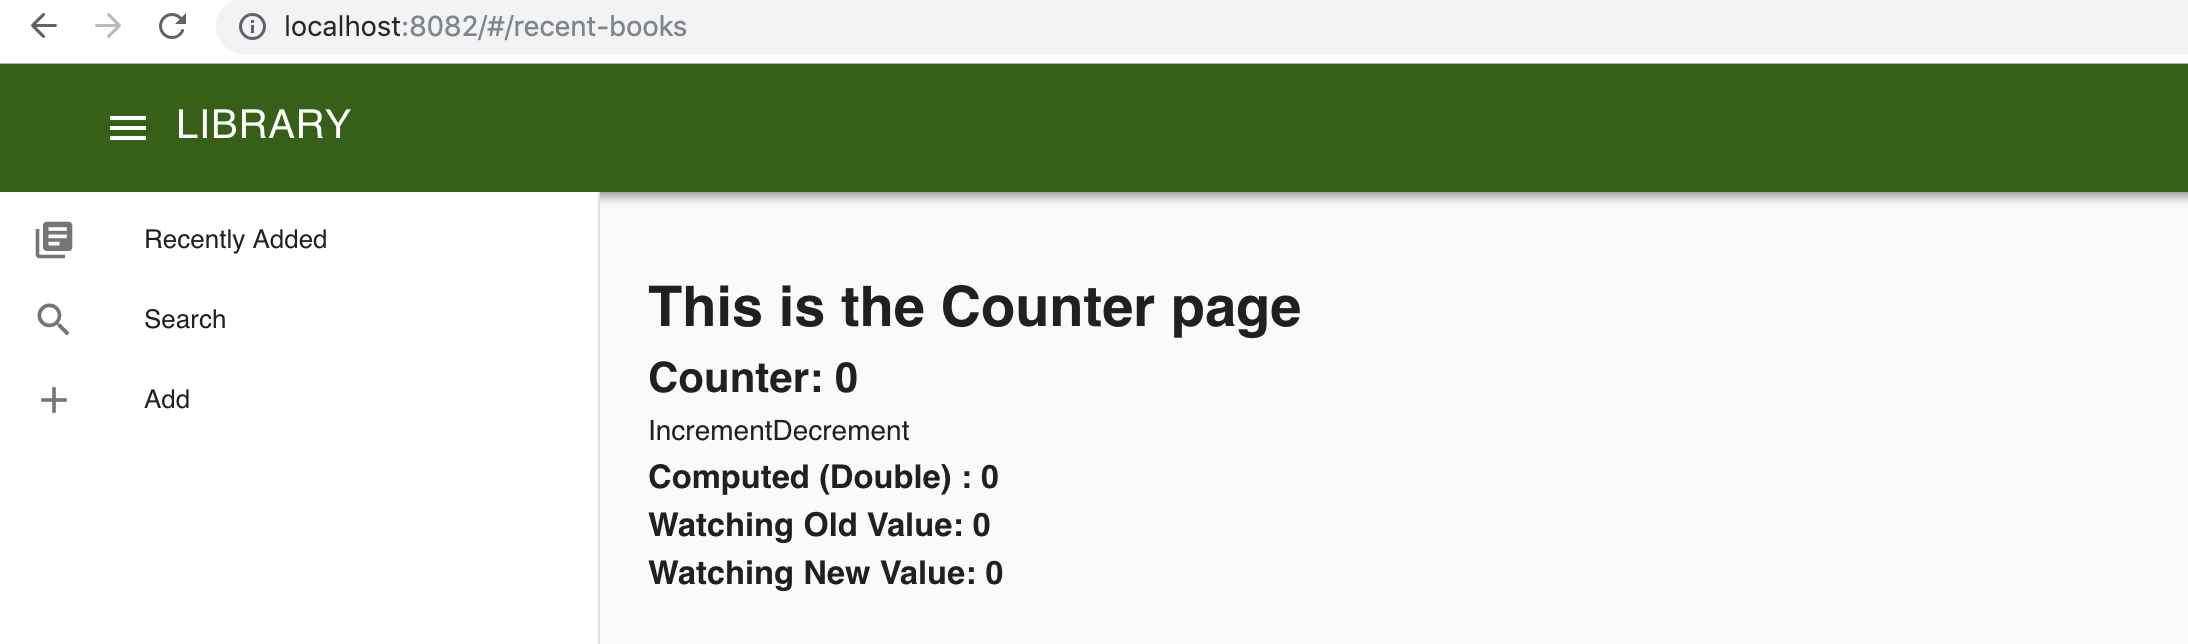
- Open browser http://localhost:8080/library
You should see 3 counter page (navbar, toolbar, recentbooks).

Goto https://metastay.gitlab.io/smile-docs/cookbook/setup_smileform.html and setup SmileGrid and SmileForm.
Open
libraryview.kviewand create a section called core. Copy the commented decorator code from SmileGrid.vue file and paste it inside the section.Copy the commented decorator code from SmileForm.vue and paste it in core section.
# Implement ToolBar And NavBar
- Open
Toolbar.vuefile in VSCode and Add tool bar code
NOTE
For predefined layouts refer - https://vuetifyjs.com/en/framework/pre-defined
<template>
  <v-toolbar
      color="success darken-3"
      dark
      app
      :clipped-left="$vuetify.breakpoint.mdAndUp"
      fixed
    >
      <v-toolbar-title style="width: 300px" class="ml-0 pl-3">
        <v-toolbar-side-icon @click.stop="toggleDrawer"></v-toolbar-side-icon>
        <span class="hidden-sm-and-down text-uppercase">Library</span>
      </v-toolbar-title>
  </v-toolbar>
</template>

<script lang="ts">
import { Vue, Component, Prop, Emit, Watch } from 'vue-property-decorator';
// import store, * as Store from '@/../src-gen/store';
// import * as Data from '@/../src-gen/data';
// import * as ServerData from '@/../src-gen/server-data';
// import * as Action from '@/../src-gen/action';

@Component
export default class Toolbar extends Vue {
  private drawer = true;
}
</script>
- Open
Navbar.vuefile in VSCode and Add nav bar code
<template>
  <v-navigation-drawer
      fixed
      :clipped="$vuetify.breakpoint.mdAndUp"
      app
      :value="drawer"
    >
      <v-list dense>
        <template v-for="item in items">
          <v-layout
            row
            v-if="item.heading"
            align-center
            :key="item.heading"
          >
            <v-flex xs6 class="text-xs-center">
              <a href="#!" class="body-2 black--text">EDIT</a>
            </v-flex>
          </v-layout>
          <v-list-tile v-else @click="$router.push({name: item.routerName})" :key="item.text">
            <v-list-tile-action>
              <v-icon>{{ item.icon }}</v-icon>
            </v-list-tile-action>
            <v-list-tile-content>
              <v-list-tile-title>
                {{ item.text }}
              </v-list-tile-title>
            </v-list-tile-content>
          </v-list-tile>
        </template>
      </v-list>
    </v-navigation-drawer>
</template>

<script lang="ts">
import { Vue, Component, Prop, Emit, Watch } from 'vue-property-decorator';
//  import store, * as Store from '@/../src-gen/store';
// import * as Data from '@/../src-gen/data';
// import * as ServerData from '@/../src-gen/server-data';
// import * as Action from '@/../src-gen/action';

@Component
export default class Navbar extends Vue {
 private drawer: true;
  private items = [
        { icon: 'library_books', text: 'Recently Added', routerName : 'RecentBooks' },
        { icon: 'search', text: 'Search', routerName : 'Search' },
        { icon: 'add', text: 'Add', routerName : 'Add' },
      ];
}

</script>

<style>
</style>
- Open browser http://localhost:8080/library
You should see the toolbar and navbar and counterpage.
NOTE
The drawer will not work as there is no communication of the variable "drawer" between toolbar.vue and navbar.vue. To resolve this we design a store by which both navbar and toolbar can access one global variable "drawer".
# Adding Store
- Open eclipse, in
libraryview.kviewcreate ads (action, data, store) under section library.
section library {
	ads Library
}
NOTE
Before Creating a store make sure you have stopped SBT and npm serve.*
- Open
Library.kviewadsfile and define a store.
data UI (drawer: boolean = `true`)
store [UI] UI{
	getter drawer => boolean
	mutation toggleDrawer()
}
- Open
UIGettersCode.tsunder store folder and implement drawer method to return the current drawer state.
export class UIGettersCode implements UIGetters {

   public drawer(state: Data.Library.UI): boolean {
    return state.drawer;
   }
- Open
UIMutationsCode.tsfile implement toggleDrawer method.
 public toggleDrawer(state: Data.Library.UI  ): void  {
    state.drawer = !state.drawer;
   }
NOTE
If your getting any errors in getter or setter .ts code - delete both the files and run prepare-force , generate-force commands on sbt.
- In
Toolbar.vuefile import store and write code to toggle the drawer inside script tag. Remove the "private drawer = true;" statement.
<script lang="ts">
import { Vue, Component, Prop, Emit, Watch } from 'vue-property-decorator';
import store, * as Store from '@/../src-gen/store';
// import * as Data from '@/../src-gen/data';
// import * as ServerData from '@/../src-gen/server-data';
// import * as Action from '@/../src-gen/action';

@Component
export default class Toolbar extends Vue {
  public toggleDrawer() {
    Store.Mutation.Library.UI.TOGGLE_DRAWER();
  }
}
</script>
- In
Navbar.vuefile import store and access the drawer inside script tag. Remove the "private drawer: true;" statement.
<script lang="ts">
import { Vue, Component, Prop, Emit, Watch } from 'vue-property-decorator';
import store, * as Store from '@/../src-gen/store';
// import * as Data from '@/../src-gen/data';
// import * as ServerData from '@/../src-gen/server-data';
// import * as Action from '@/../src-gen/action';

@Component
export default class Navbar extends Vue {
  private  dialog = false;
  @Store.Getter.Library.UI.drawer private drawer: boolean;
  private items = [
       { icon: 'library_books', text: 'Recently Added', routerName : 'RecentBooks' },
       { icon: 'search', text: 'Search', routerName : 'Search' },
      { icon: 'add', text: 'Add', routerName : 'Add' },
      ];
  }
</script>
- Now you should be able to use drawer to open/close the Navbar.
# Add Book Page
- Open
libraryview.kviewadsfile and define action and input data for addBook Api.
data AddBookForm(isbn: string, title: string, author: string, publisher: string, publishedDate: string?, status: boolean = `true`)
action [LibraApi:W:Book.addBook] AddBook {
	input(AddBookForm)
}
- Add SmileForm decorator for the input data as it should be displayed as a form to the user.
data AddBookForm(core.SmileForm)(isbn: string(), title: string(), author: string(), publisher: string(), publishedDate: string?(datepicker), status: boolean = `true`())
NOTE
The form will not be displayed unless you give atleast one "()" to a field.
- Open
Add.vuein VSCode and import the data , smileForm and define the addInputForm Data.
<script lang="ts">
import { Vue, Component, Prop, Emit, Watch } from 'vue-property-decorator';
// import store, * as Store from '@/../src-gen/store';
import * as Data from '@/../src-gen/data';
// import * as ServerData from '@/../src-gen/server-data';
// import * as Action from '@/../src-gen/action';
import SmileForm from '@/section/core/components/smile/SmileForm.vue';

@Component({
  components: { SmileForm }
})
export default class Add extends Vue {
  private addBookForm = new Data.Library.AddBookForm();
  private decorator = Data.Library.AddBookForm.toSmileFormDecorator();

}
</script>
NOTE
Decotator for each SmileForm/SmileGrid should be defined (with different variable names) as to convert the fields to the specified (in eclipse) decorator Format.
- In
Add.vueadd SmileForm Code in the template.
<template>
  <v-layout>
    <v-flex>
      <v-card>
        <SmileForm
          v-model='addBookForm'
          :decorator='decorator'
          title='Add Book'
          submit-text='Add Book'
          @submit='addBook'>
        ></SmileForm>
      </v-card>
    </v-flex>
  </v-layout>
</template>
NOTE
v-model takes the inputForm data.
- Import Action and define the addBook method inside script tag to add the book to DB when the "Add Book" button is clicked.
private addBook() {
    Action.Library.AddBook.execute(this.addBookForm, output => this.$router.push({name : 'Details.Summary', params : {bookId : output.bookId}}));
  }
NOTE
this.$router.push - takes us to a different page when the function execution is completed. Here on submitting it takes us to details page when book details will be displayed.
- Open browser http://localhost:8080/add You should be able to see AddForm page.
- After inputing the field, when you click on "Add Book" you must be directed to details page, with the book id in the url.
# Search Book Page
- Open
libraryview.kviewadsfile and define action and input, output data for SearchBook Api with SmileForm and SmileGrid decorators.
data SearchBookForm(core.SmileForm)(title: string?({ "flexClasses" : "md3"}), category: string?({ "flexClasses" : "md3"}), author: string?({ "flexClasses" : "md2"}), publisher: string?({ "flexClasses" : "md2"}))

data SearchBookResultGrid(core.SmileGrid)(bookId: string, isbn: string(), title: string({"link" : ":bookId/details"}), category: string*(), author: string(), publisher: string(), status: boolean = `true`())
action [LibraApi:R:Book.searchBook] SearchBook {
	input(SearchBookForm)
	output(SearchBookResultGrid*)
}
- Open
Search.vuein VSCode and import the data, SmileForm, SmileGrid and define the searchForm and searchOutput Data and write SmileForm and SmileGrid code in the template and write a action for SearchBook inside searchBook method.
<template>
  <v-layout column>
    <v-flex>
      <v-card>
        <SmileForm
          v-model='searchBookForm'
          :decorator='decorator'
          title='Search Book'
          submit-text='Search'
          @submit='searchBook'
          :cancel="false">
        ></SmileForm>
      </v-card>
    </v-flex>
    <v-flex>
      <v-card>
        <SmileGrid
          grid-title='Search Result'
          :items="searchBookResult"
          :decorator="gridDecorator"
        ></SmileGrid>
      </v-card>
    </v-flex>
  </v-layout>
</template>

<script lang="ts">
import { Vue, Component, Prop, Emit, Watch } from 'vue-property-decorator';
import * as Data from '@/../src-gen/data';
import SmileForm from '@/section/core/components/smile/SmileForm.vue';
import SmileGrid from '@/section/core/components/smile/SmileGrid.vue';
import * as Action from '@/../src-gen/action';


@Component({
  components: { SmileForm, SmileGrid }
})
export default class Search extends Vue {
  private searchBookForm = new Data.Library.SearchBookForm();
  private decorator = Data.Library.SearchBookForm.toSmileFormDecorator();
  private searchBookResult: Data.Library.SearchBookResultGrid[] = [];
  private gridDecorator = Data.Library.SearchBookResultGrid.toSmileGridDecorator();

  private searchBook() {
    Action.Library.SearchBook.execute(this.searchBookForm, output => this.searchBookResult = output);
  }
}
</script>
NOTE
"items" in SmileGrid take gridOutput data as input.
- Open browser http://localhost:8080/libraryview#/search You should be able to see SearchForm and Search Result Grid in the page.
- Now you should be able to search a book and find the result displayed in the grid
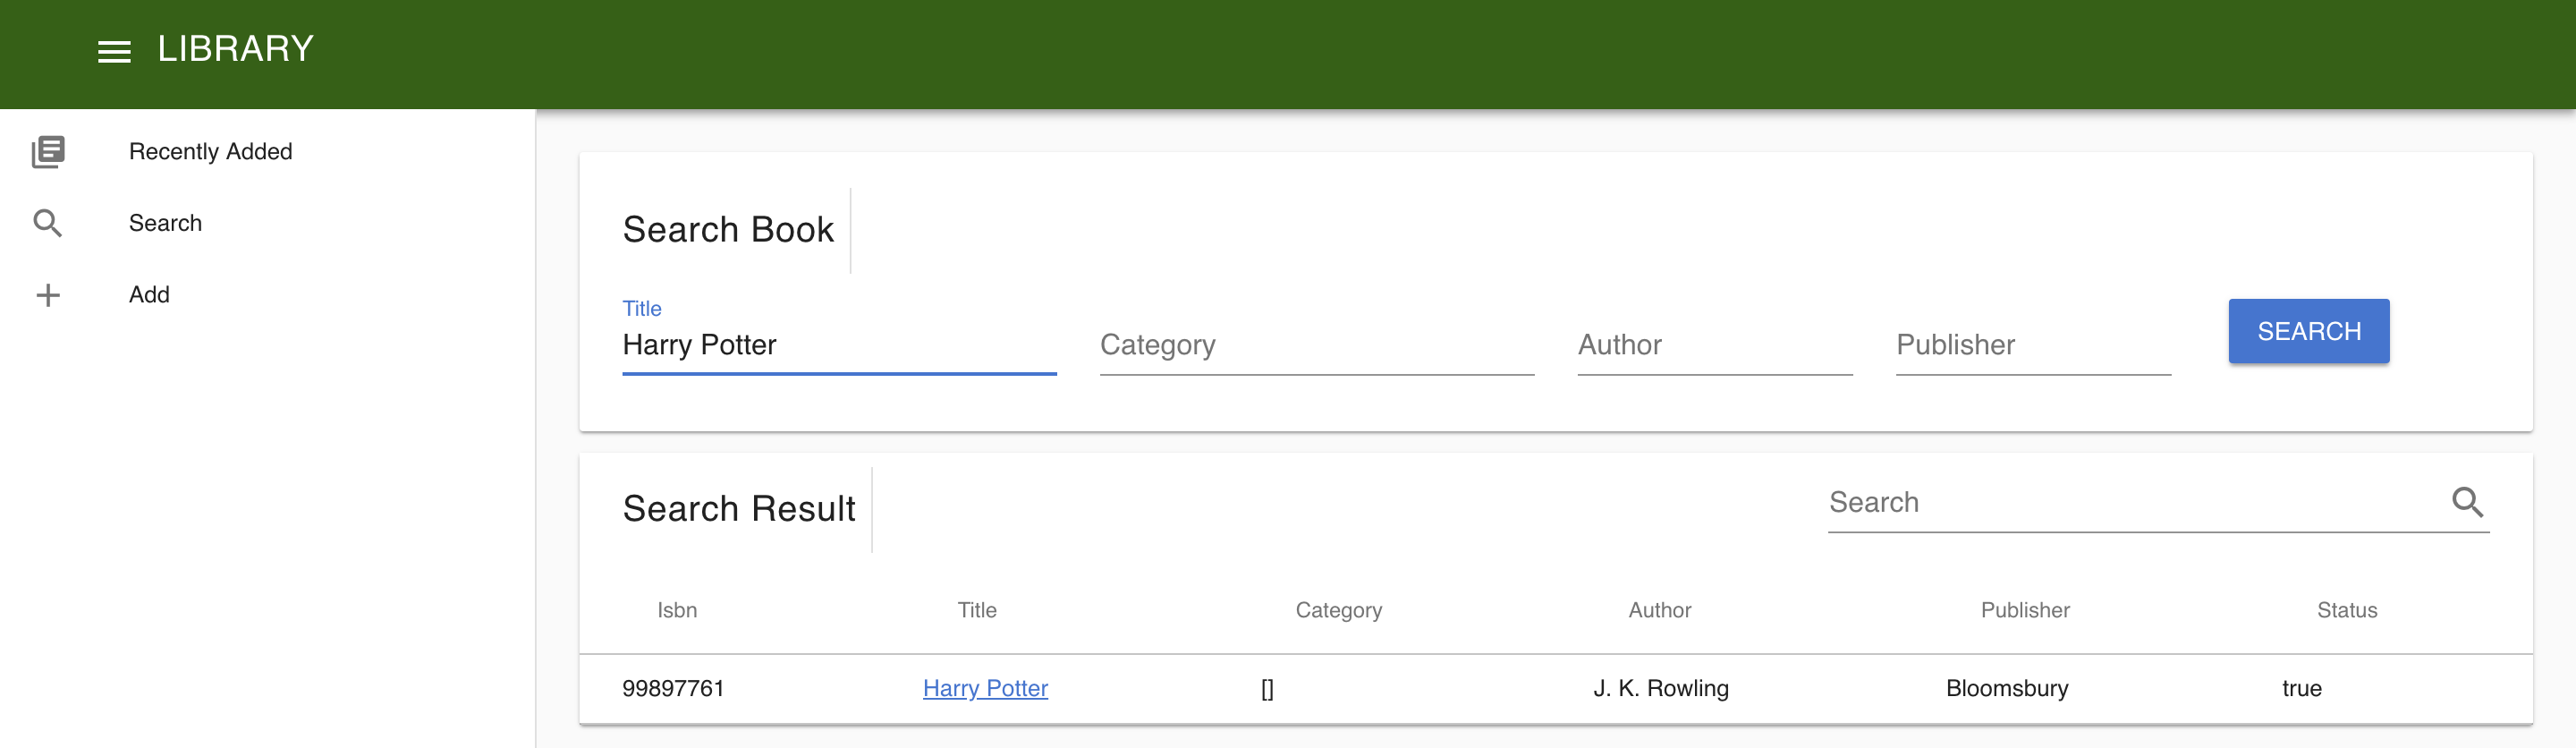
- On clicking the book name in the grid you should be directed to book details page.
# Book Details Page
- Open
Library.kviewadsin eclipse and define action for getDetails.
data BookDetails(bookId: string, isbn: string, title: string, category: string*, author: string, publisher: string, status: boolean = `true`)
action [LibraApi:R:Book.getBookDetails] GetBookDetails {
	output(BookDetails?)
}
- Open
Details.vuein VSCode and define BookDetails data.
private bookDetails = new Data.Library.BookDetails();
- Define getBookDetails method and call it in mounted method.
<script lang="ts">

import { Vue, Component, Prop, Emit, Watch } from 'vue-property-decorator';
// import store, * as Store from '@/../src-gen/store';
import * as Data from '@/../src-gen/data';
// import * as ServerData from '@/../src-gen/server-data';
import * as Action from '@/../src-gen/action';

@Component
export default class Details extends Vue {
private bookDetails = new Data.Library.BookDetails();
private mounted() {
    this.getBookDetails();
  }

  private getBookDetails() {
    Action.Library.GetBookDetails.execute1(this.$route.params.bookId, output => {
      if (output) {
        this.bookDetails = output;
      }
    });
  }
}

</script>
- Write the template code to display details.
<template>
<v-layout column
justify-center>
<v-flex>
<v-expansion-panel >
<v-expansion-panel-content
hide-actions
>
<v-layout
slot="header"
align-center
row
spacer
>
<v-flex xs4 sm2 md1>
<v-avatar
slot="activator"
size="36px"
>
<v-icon
color="red"
>book</v-icon>
</v-avatar>
</v-flex>
<v-flex sm5 md3 hidden-xs-only>
<strong v-html="bookDetails.title"></strong>
<span
v-if="bookDetails.author"
class="grey--text"
>
({{ bookDetails.author }})
</span>
</v-flex>
<v-flex no-wrap xs5 sm3>
<v-chip
v-if="bookDetails.status"
color="green lighten-4"
class="ml-0"
label
small
>
AVAILABLE
</v-chip>
<v-chip
v-if="!bookDetails.status"
color="red lighten-4"
class="ml-0"
label
small
>
NOT AVAILABLE
</v-chip>
<strong v-html="bookDetails.isbn"></strong>
</v-flex>
<v-flex
v-if="bookDetails.publisher"
class="grey--text"
ellipsis
hidden-sm-and-down
>
—
{{ bookDetails.publisher }}
</v-flex>
</v-layout>
<!-- todo ADD CATEGORY -->
<!-- todo Make Book Available/Unavailable -->
</v-expansion-panel-content>
</v-expansion-panel>
</v-flex>
</v-layout>
</template>
NOTE
Refer vuetify Avatars to see how the details template is designed. You can use any of the template.
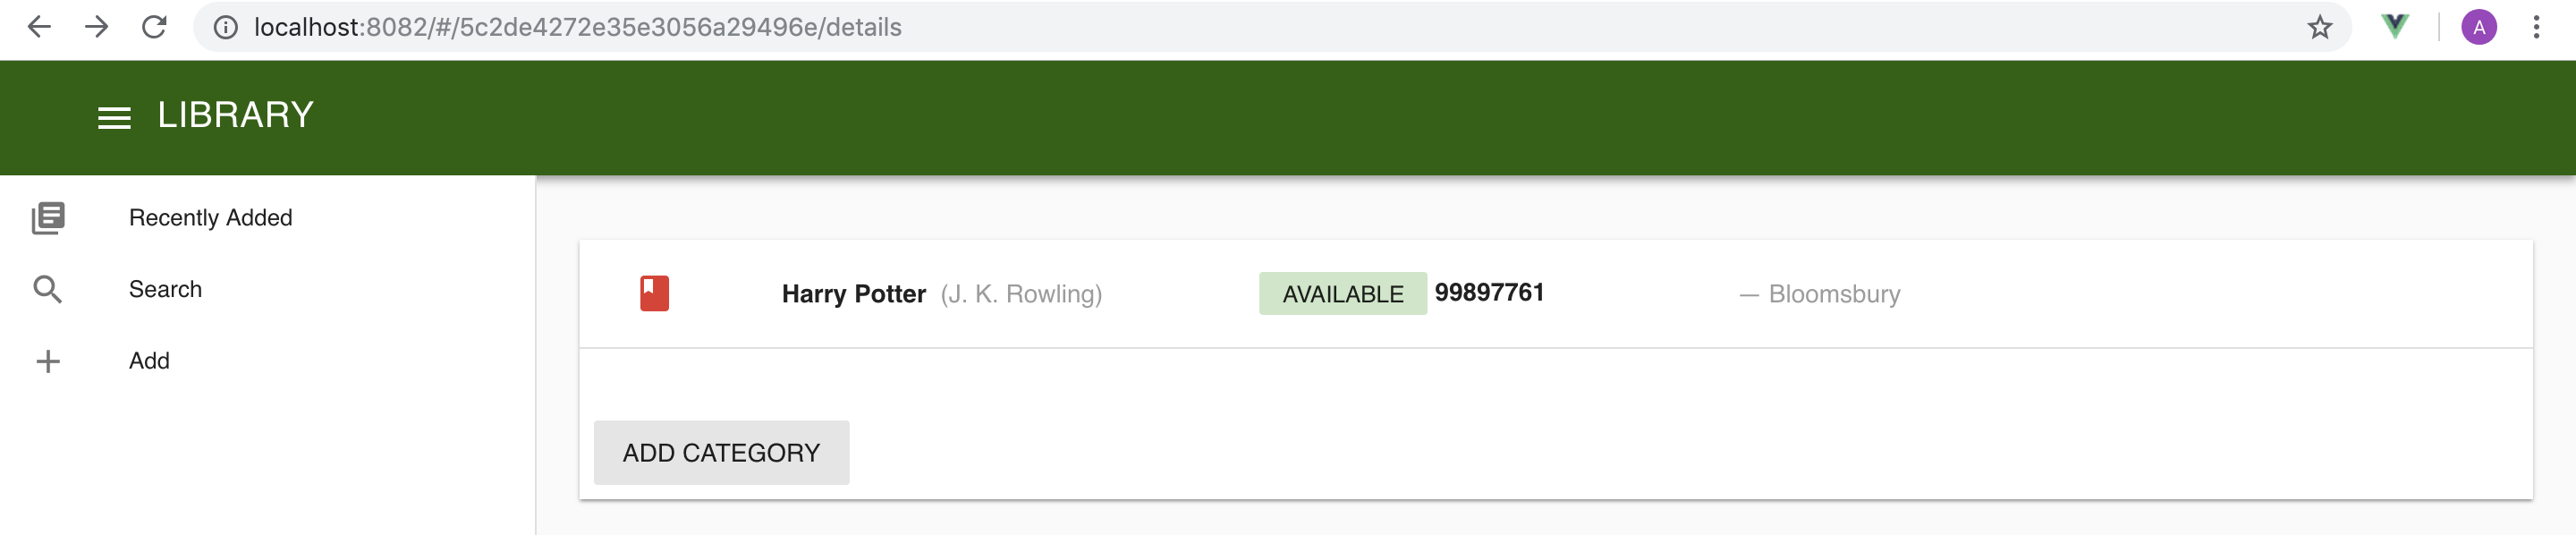
- Search for a book and go to details page, you should be able to see the details of the book.
# Add Category
- Open
Details.vuein VSCode and add a button "Add Category" above "todo ADD CATEGORY" comment in template.
    <v-card>
      <v-divider></v-divider>
      <v-card-text>
        <span class="text-xs-center" v-for="(category, index) in bookDetails.category" :key="index">
          <v-chip close">{{category}}</v-chip>
        </span>
      </v-card-text>
      <v-card-actions>
        <v-btn flat @click="$router.push({name : 'Details.AddCategory', params : $route.params})">Add Category</v-btn>
	  </v-card-actions>
    </v-card>

    <!-- todo Make Book Available/Unavailable -->
- In browser you should be able to see the ADD CATEGORY button on clicking the expansion card in details page. Upon clicking the ADD CATEGORY button you should be directed to Add Category Page.
- Open
Library.kviewadsin eclipse and define a AddCategory action and input form
data AddCategoryForm(core.SmileForm)(bookId: string, category: string())
action [LibraApi:W:Book.addCategory] AddCategory
- Open
AddCategory.vuein VSCode and define addCategory input data, smile Form and addCategory method which has AddCategory action inside script.
<script lang="ts">

import { Vue, Component, Prop, Emit, Watch } from 'vue-property-decorator';
// import store, * as Store from '@/../src-gen/store';
import * as Data from '@/../src-gen/data';
// import * as ServerData from '@/../src-gen/server-data';
import * as Action from '@/../src-gen/action';
import SmileForm from '@/section/core/components/smile/SmileForm.vue';

@Component({
  components: { SmileForm }
})
export default class AddCategory extends Vue {
  private addCategoryForm = new Data.Library.AddCategoryForm();
  private addCategoryFormDecorator = Data.Library.AddCategoryForm.toSmileFormDecorator();

  public addCategory() {
    this.addCategoryForm.bookId = this.$route.params.bookId;
    Action.Library.AddCategory.execute(
      this.addCategoryForm,
      output => {
        this.$router.push({name : 'Details.Summary', params : {bookId : this.$route.params.bookId}});
      }
    );
  }
}
</script>
- Write the SmileForm code inside template
<template>
 <v-layout>
   <v-flex>
     <v-card>
       <SmileForm
       title="Add Category"
       v-model='addCategoryForm'
       :decorator='addCategoryFormDecorator'
       submit-text='Add Category'
       @submit='addCategory'
       >
       </SmileForm>
     </v-card>
   </v-flex>
 </v-layout>
</template>
- Now on clicking the ADD CATEGORY in your browser you must see a Add Category form and upon clicking add the category should be added to your DB and you should be directed to details page and the category displayed as a chip.
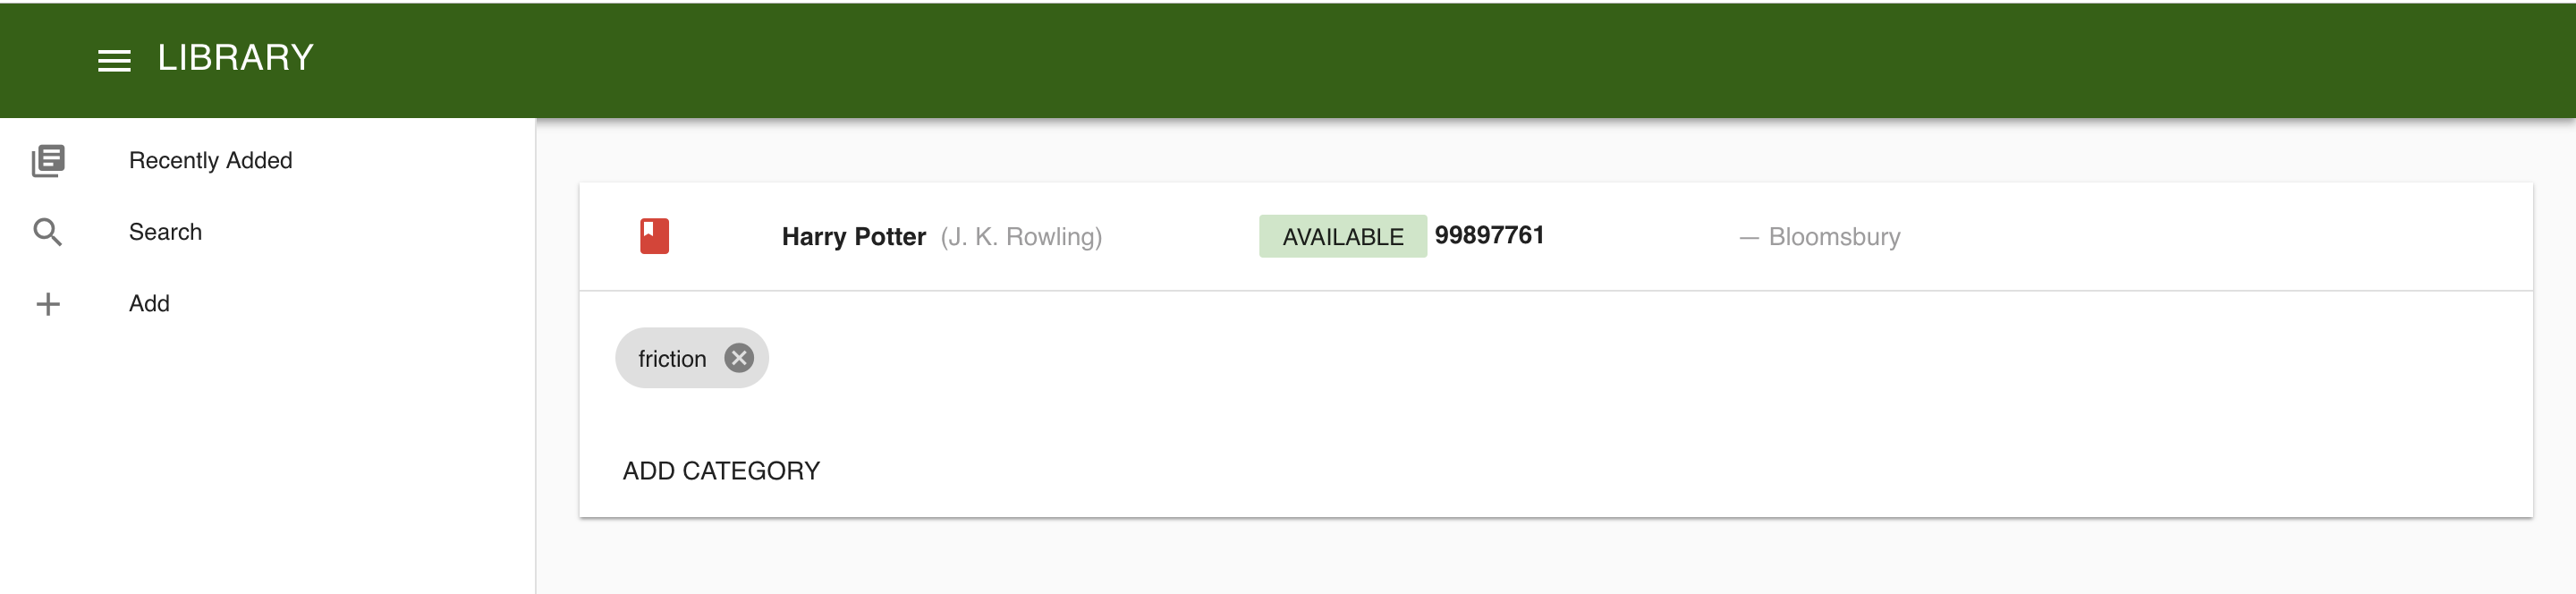
- In
Library.kviewadsfile write action to remove a category.
action [LibraApi:W:Book.removeCategory]RemoveCategory
- To remove the category when the cross(x) symbol is clicked implement the "removeCategory(category)" method in
Details.vuefile. Import Snackbar.
<script lang="ts">
import { Vue, Component, Prop, Emit, Watch } from 'vue-property-decorator';
// import store, * as Store from '@/../src-gen/store';
import * as Data from '@/../src-gen/data';
// import * as ServerData from '@/../src-gen/server-data';
import * as Action from '@/../src-gen/action';
import * as Snackbar from 'node-snackbar';

@Component
export default class Details extends Vue {
  private bookDetails = new Data.Library.BookDetails();
  private mounted() {
    this.getBookDetails();
  }

  private getBookDetails() {
    Action.Library.GetBookDetails.execute1(
      this.$route.params.bookId,
      output => {
        if (output) {
          this.bookDetails = output;
        }
      }
    );
  }
  private removeCategory(category: string) {
    console.log('I am in removeCategory  ' + category);
    Action.Library.RemoveCategory.execute2(this.$route.params.bookId, category, output =>  {
      this.getBookDetails();
      Snackbar.show({ text: category + ' category removed.', pos: 'bottom-center' });
    });
  }
}
</script>
- Call the removeCategory method in v-chip of category in template of
Details.vue
<v-chip close @input="removeCategory(category)">{{category}}</v-chip>
Now you should be able to remove a category.
# Assignments
- Implement the Recent Book page.
Follow these steps :
- In Eclipse
- Define Action.
- Define Data for input and output (if any).
- Define SmileForm/SmileGrid Decorators (if any).
- In VSCode
- Create input and output data, define decorators for input , output.
- Design the template.
- Implement the required action when some action(onclick,onsubmit .etc) is trigerred.
- Add a button to change the status of the book from available to unavailable and vice versa. The code can be inserted where the comment "todo Make Book Available/Unavailable" is written in the template.